Wednesday 28 December 2016

Enable mac filtering on D-link Routers.


This is how you can enable mac filtering on dlink Router

First of all make sure you are connected to your router either wirelessly or through LAN (Local area Network).
1. Enter 192.168.1.1 in your browser URL. A window will open asking username and password.
D-LINK router 192.168.1.1 home page
Mostly, the default username is admin and password is also admin. If you have not changed it just enter admin in the password but if you changed it then enter the one you have changed.
Learn: How to Change Dlink default admin password? call at 1800 987 893
2. After entering the password click on Login and new window will open.
dlink router interface
Click on the Advanced Tab. Another window with option of MAC filtering will come.
How to enable MAC filtering on D-link Routers?
3. Click on Mac Filtering button under ADVANCED WIRELESS — MAC FILTERING row. Another window with option to add MAC address will come.
Enable MAC filtering - List of MAC addresses and add mac option
Select the option Enable Access Control Mode and Click on Add button.
IF you get stuck somewhere  or you have an issue which you are not able to fix by yourself we would suggest you to take help of professionals to fix it .
Our D-Link technicians have many years of experience and possess top-notch knowledge about D-Link routers and all other D-Link networking products such that they can resolve almost all bugs through remote access technology.
                                  Call us now at our toll free number 

                            Australia:  


logon to our website:  


Wednesday 21 December 2016

Changing the IP Address on a Dlink DIR-655 router

Login To The Dlink DIR-655

To get started configuring the Dlink DIR-655 LAN page you need to login to your router. If you are already logged in you can skip this step.
To login to the Dlink DIR-655, follow our Dlink DIR-655 Login Guide.

Change the LAN IP Address on a Dlink DIR-655

If you followed our login guide above then you should see this screen.

When you have logged into the Dlink DIR-655 you see the Setup page. When changing the IP Address, the local address you are looking at while inside the network, click the blue box, on the left labeled Network Settings.

Configure the LAN section of your Dlink DIR-655


This places you on a new page. Scroll down to the heading Router Settings, and click the box labeled Router IP Address. Enter the address you have chosen for your Router here. In this screenshot, it shows the address of 192.168.0.1, we recommend you use this also.
The Subnet Mask should almost always stay at 255.255.255.0, the DHCP Server should also almost always be enabled.
When you are finished, save your changes by clicking Save Settings, this is near the top.

Possible Problems when Changing your LAN IP Address

When you change your LAN IP Address you are making a fundamental change to how your network functions and all computers on your network will be affected. You will lose your Internet connection when you apply these changes. Your router may reboot and require a couple of minutes to start responding again.
Also note that some computers may need to be rebooted after you make this change before they can talk to the router or on the Internet again.
you might get some issues while setting up manually . so we would recommend you to get technical support from our experienced team .
Whenever a D-Link user needs a technical guidance, they get in touch with our D-Link Support service team. Our D-Link Support technicians are available through out  live chats, emails or over the phone

Call now for Australia toll free number :                        1800 987 893

USA :    18888 479 2017

Wednesday 14 December 2016

What you can Do if You Forget Your Network Passwords for D-link router

Resetting your D-Link® router’s Wi-Fi password is easy:

  • Type your router’s IP address —192.168.0.1— into your Web browser.
  • At the login screen, select “Admin” from the drop down menu and enter your admin password.
  • Once you access the Web configuration screen, click “Setup” in the top menu.
  • Select the “Wireless Settings” link on the left-hand side.
  • From there, click on the “Manual Wireless Connection Setup” button.
  • Scroll down to the field representing my “Pre-Shared Key”. If you don’t see it, select a security mode from the dropdown menu at the bottom of the screen first.
  • Type in a new password. (I use a hybrid WPA/WPA2 security mode.)

That’s it! Now for the more challenging of the two: the forgotten admin password.


The Forgotten Admin Password
If you forget your Web configuration password, you’re stuck: you have no way to change any settings on your router. Your only recourse is to use a paperclip or other pointy object to reset your router to its factory settings. With the
paperclip, hold down the tiny reset button on the back of your router for about five seconds. Your router lights will blink to confirm the factory reset. You can now use the router’s default password to log into its Web configuration screen (look in your router manual if you can’t remember what this is). Once you’re in, be sure to change this password to something unique. (To ensure a strong password, try Strong Password Generator.)
We all forget passwords. But with a little prep work, your router will be ready to rebound when you have a memory slip.

If you are not able to reset the password you can call at our toll free number 1800 897 983.

Our D-Link Support solution’s tech team provides real time results supporting all D-Link networking devices.

log on to our website to know more:

http://www.support-router.com/au/d-link-support/

Monday 5 December 2016

Configure VPN on D-Link Router Manually

How to Configure VPN on D-Link Router Manually

Before you begin, please make sure that:
·        You have a working internet connection
1.       Go to setup:
·        Click on Internet tab on left hand navigation
·        Click on Manual Internet Connection setup


2. From “My internet connection is” select ” PPTP(Username/Password) “
Under PPTP Internet Connection TYPE section.

       ·        Select Address Mode” Dynamic “
·        Enter your Ivacy desired server address into Server IP address field. ·
         Enter your Ivacy credential“Email & Password” you registered with Ivacy
·        Click on “Save Settings”
·        VPN Connection will establish in few seconds.


If you face any issue in Ivacy VPN connection setup, then please feel free to contact our Customer Support Team at 1800 987 893 for Australia or you can log on to our website http://www.support-router.com/au/d-link-support/ for any further assistance.

Whenever a D-Link user needs a technical guidance, they get in touch with our D-Link Support service team. Our D-Link Support technicians are available through out  live chats, emails or over the phone. More important, Australia Router Support ( ARS ) Inc.’s D-Link Support teams are located in most populated IT hubs of Australia like Melbourne , Brisbane , Perth , Adelaide , Sydney etc where use of D-Link Networking devices and Wireless Routers is high .


Toll free number for Australia: 

1800 987 893


Monday 28 November 2016

D-Link Router Setup for Smart DNS Proxy


Following setup instructions is only needed one time. Once you finish the initial setup you won't be needing to take the same steps anytime. Your connection will work automatically *anytime!
 
--- --- ---

 Please make sure you have the most recent firmware available. 


1. Open D link Router Administration Page 

2. Enter Your User Name and Password if you have one. Default name is admin and the default password is password.

3. Click on Manual Internet Connection Setup Button at the bottom or WAN on the left.


4. Fill DNS Server fields with the Smart DNS Proxy Ips from following. Chose the servers closest to your physical location for Primary and Secondary.

Australia - Melbourne
168.1.79.238
Australia - Sydney
54.66.128.66
Brazil
54.94.226.225
Canada - Montreal
169.54.78.85
Canada - Toronto
169.53.182.120
Germany
54.93.173.153
India
169.38.73.5
Ireland
54.229.171.243
Israel
195.28.181.161
Italy
95.141.39.236
Japan
54.64.107.105
Mexico
169.57.10.21
Netherlands
46.166.189.68
New Zealand
223.165.64.97
Singapore
54.255.130.140
South Africa 1
154.70.152.42
South Africa 2
129.232.164.26
Spain
192.162.27.100
Sweden
46.246.29.69
Switzerland
81.17.17.170
Turkey
188.132.234.170
US East - N. Virginia
23.21.43.50
US Center - Dallas
169.53.235.135
US West - Los Angeles      
54.183.15.10

5. Click on Save Settings or OK button.

Attention

Make sure to RESTART your Router!


* Remember whenever your PC/Router IP changes, our service will stop working for you. You will need to LOGIN to Smart DNS Proxy and UPDATE your IP address. So our system will check your IP address and add your new IP to our database. Then you will be able to continue using our service. If this is the first time you setup, we also suggest you to login with your PC to our site from the same Wired/Wireless network to show our system your IP address.

For further help you can call our technicians at our toll free number  1888 479 2017
Our certified experts aims at delivery quality and instant support assistance for D-link. The professionals won’t leave your issue in the middle; they are committed for delivering reliable solution to every technical problems a user comes across.

Tuesday 22 November 2016

Configure Your Dlink Modem Router Using Setup Wizard

  In this blog you will get detail how to configure your modem router for Internet and Wireless connection using the Setup Wizard accessible via a Web Browser.
D-Link note: running the Setup Wizard will reconfigure all your modem router settings.


Step 1. Open your Internet Browser and in the address field type in http://192.168.1.1


 Step 2. When prompted type in the Username and Password then click on the “Log In” button.  The factory settings are:
 Username: admin Password: admin


 If there is an error than you will need to reset the modem to factory defaults by pressing the reset button for 10 seconds. Please note that this will revert all the settings in the modem to factory settings and you will have to reconfigure it with your Internet settings and Wireless security. Make sure you have your Internet account details. D-Link Technical Support – Configuration using Web Browser
Or you can call our technical support team for it ( 1888 479 2017)

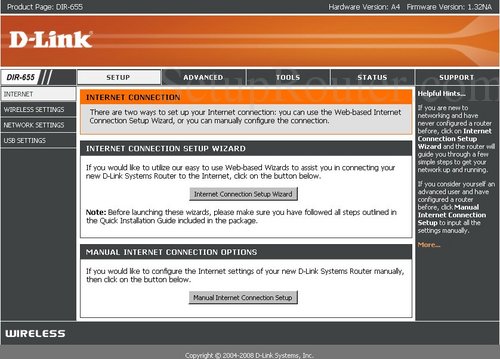
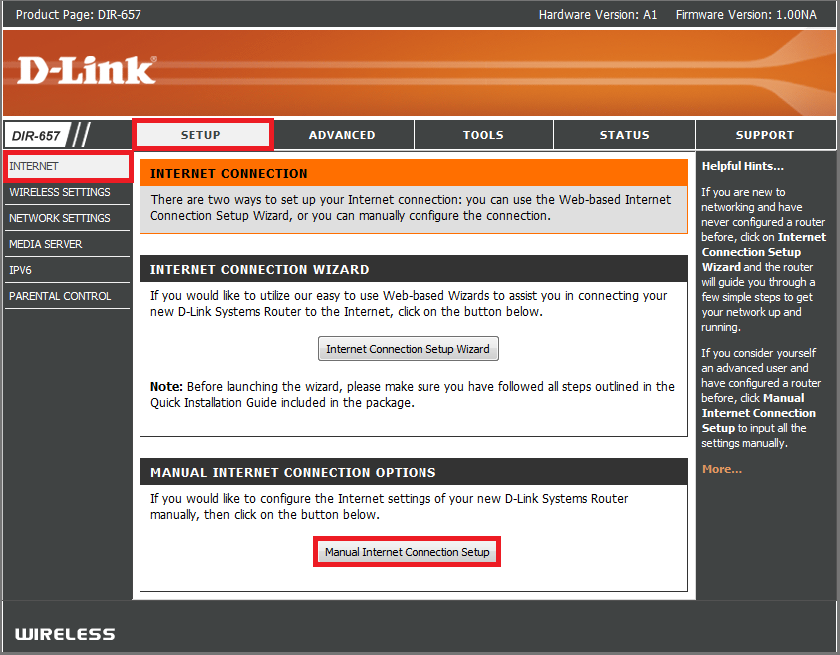
 Step 3. After logging in you will be presented with the modem’s configuration pages. Click on the Setup Wizard button:


Step 4. The Setup Wizard will display the steps required to configure your modem router. Click the Next button:


Step 5. Change the password that is used to access your modem router. Click the Next button. D-Link Technical Support – Configuration using Web Browser (Setup Wizard)
If you are facing any issue just take help of a professional technician for proper solutions.


 Step 6. Select your Time Zone. Click the Next button to continue:


 Step 7. Enter your Internet Provider details: select Country and your Internet Provider. If your provider is not listed, select “Other”: Providers in USA / Australia typically use these settings: Protocol: PPPoE; Connection Type: LLC; VPI: 8; VCI: 35 Providers in New Zealand typically use these settings: Protocol: PPPoA; Connection Type: VC-Mux; VPI: 0; VCI: 100 D-Link Technical Support – Configuration using Web Browser (Setup Wizard) Page 5 of 6.
You can contact your internet service provider for details
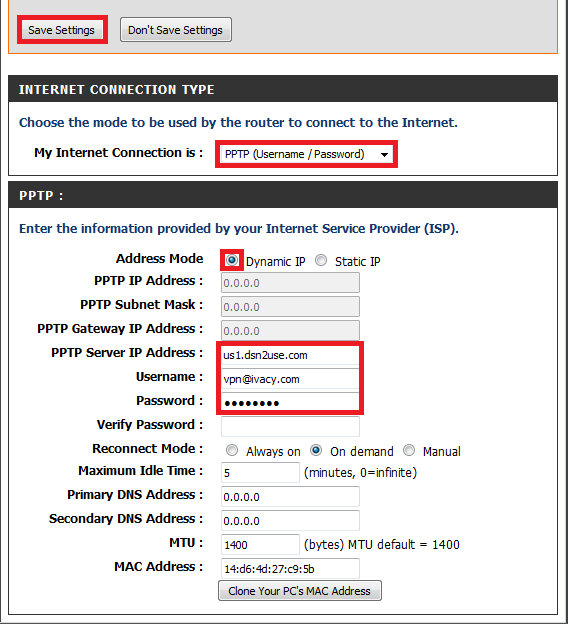


 Step 8. Set your Internet connection. In the Username and Password field please type in your Internet account details as given by your Internet Service Provider. Click on the Next button.


 Step 9. Set the name for your wireless network. Type in names for both 2.4GHz and 5GHz Wi-Fi networks, something that you can easily identify.


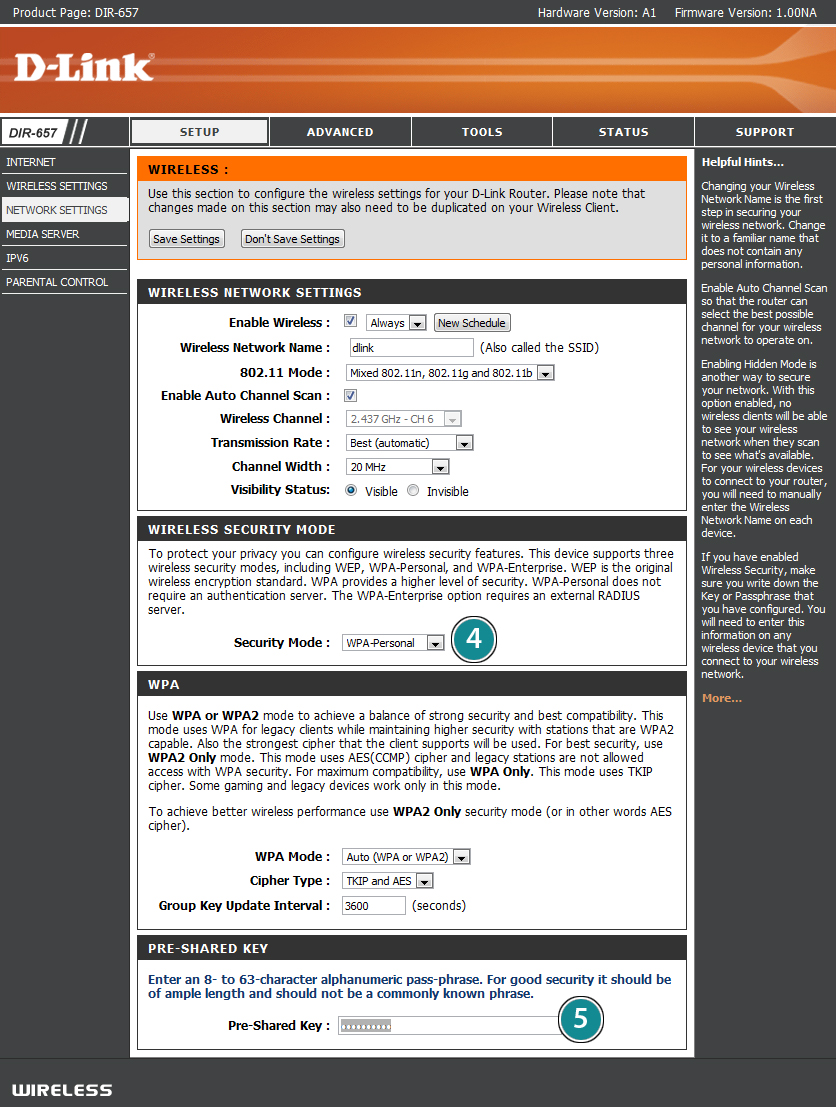
Step 10. Set the level of security you want to use on your wireless network. It is recommended to select the “Best” option (WPA2). D-Link Technical Support – Configuration using Web Browser (Setup Wizard)


Step 11. Set the security password for both of your wireless networks. Take a note of this password as you will need to enter it into all your devices trying to connect to your Wi-Fi network for the first time. After you click on the Next button your modem router will apply the selected settings. Click on the Connect button. 
Your modem router’s Internet and Wireless configuration is now complete.


Step 12. IF still there are errors than easily you can fix it by taking help of experts for that you just have to call our Microsoft certificated technicians. Our certified experts aims at delivery quality and instant support assistance for D-link. The professionals won’t leave your issue in the middle; they are committed for delivering reliable solution to every technical problems a user comes across.

Call Us Now! 1800 987 893 (Toll-free)

or log on to:

https://www.icognix.net/technical-support-for-dlink/


Tuesday 1 November 2016

10 Steps to troubleshoot your D-link router

Wireless signals aren't perfect, however, and you may notice a loss of signal strength to any of your computers due to a variety of factors. Depending on whether the problem is caused by physical interference or a software issue, several troubleshooting options are available.

THINGS YOU'LL NEED


STEP 1

Remove the D-Link router from its current position if it is placed inside an enclosed space, such as a cabinet. Set the D-Link in a centralized location closer to your computer and see if the wireless connection becomes more stable.

STEP 2

Unplug or power off any 2.4 GHz cordless phones or Bluetooth devices currently active near the network because they can interfere with the wireless signal coming from the router. Locate the small reset hole on the back end of the router if the problem persists. The hole is positioned to the left of the power cable.

STEP 3

Unfold a paper clip and insert the edge of the clip into the reset hole to press the reset button. Hold the clip in place for 10 seconds to reset all of the D-Link router's options to the default factory condition.

STEP 4

Open a Web browser and navigate to the address "192.168.0.1" to open the D-Link's setup page. Type "admin" in the User Name field and click "OK." Leave the Password field blank.

STEP 5

Click the "Setup Wizard" icon. Select the "Launch Internet Connection Setup Wizard" option. Click "Next" and type a new password for your router in the text box. Click "Next" again.

STEP 6

Follow the prompts on the screen to select your time zone and type of high-speed Internet connection. Click "Next" and "OK." Navigate to the D-Link support Web page.

STEP 7

Click "See All Products" and select the link for your wireless router's model. Click "Support Resources" and "Firmware." Select the "Download Now" link next to the most recent firmware version available.

STEP 8

Navigate back to the router's menu by accessing the Web address "192.168.0.1." Type "admin" for the username and type your new password in the Password field. Click "OK."

STEP 9

Click "Tools" and "Firmware." Click "Browse" and choose the name of the firmware file you downloaded. Click "Open." Choose "Save Settings" to upgrade the wireless router's firmware.

STEP 10

Right-click the network icon in the lower-right end of your screen and click the name of your D-Link router to connect to the network.
Note: Still the problem occurs you can call us our Microsoft certificated team will fix it for you. Australia Router Support ( ARS ) Inc.’s D-Link technicians are available for 24*7*365. Whenever a D-Link user needs a technical guidance, they get in touch with our D-Link Support service team. Our D-Link Support technicians are available through out  live chats, emails or over the phone. 
call us at our toll free number 
Australia: 1800 987 893
UK : 0800 820 3300 
or 
log on to : http://www.support-router.com/au/d-link-support/